Tutorial
Git 03: Git Clone - Work Locally On Your Computer
Authors: Megan A. Jones
Last Updated: Apr 8, 2021
This tutorial covers how to clone a github.com repo to your computer so
that you can work locally on files within the repo.
- Be able to use the
git clonecommand to create a local version of a GitHub repository on your computer.
Additional Resources
- Diagram of Git Commands -- this diagram includes more commands than we will cover in this series but includes all that we use for our standard workflow.
- GitHub Help Learning Git resources.
Clone - Copy Repo To Your Computer
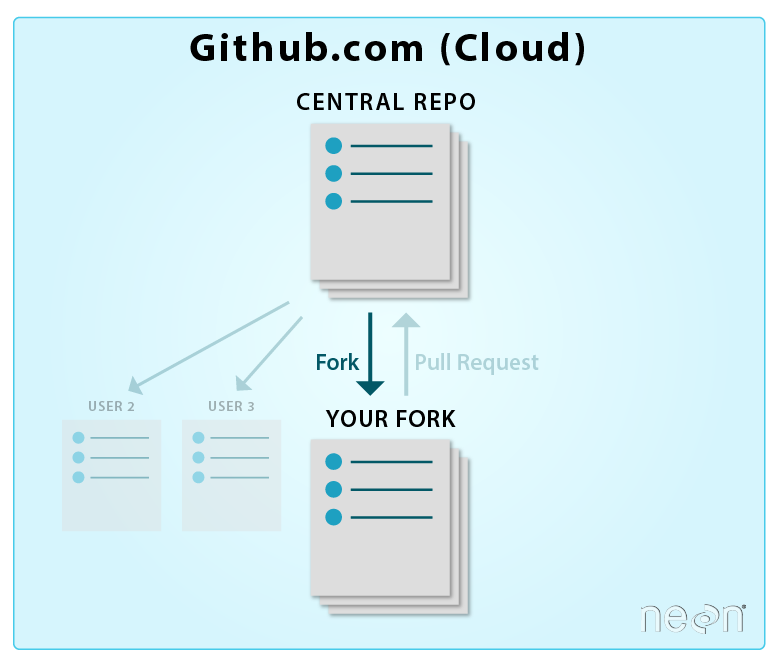
In the previous tutorial, we used the github.com interface to fork the central NEON repo. By forking the NEON repo, we created a copy of it in our github.com account.

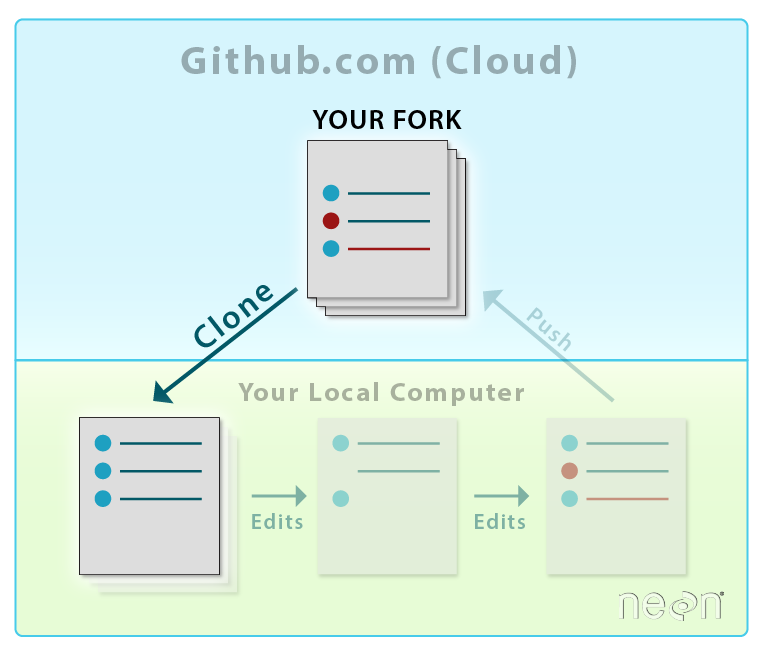
Now we will learn how to create a local version of our forked repo on our laptop, so that we can efficiently add to and edit repo content.

Copy Repo URL
Start from the github.com interface:
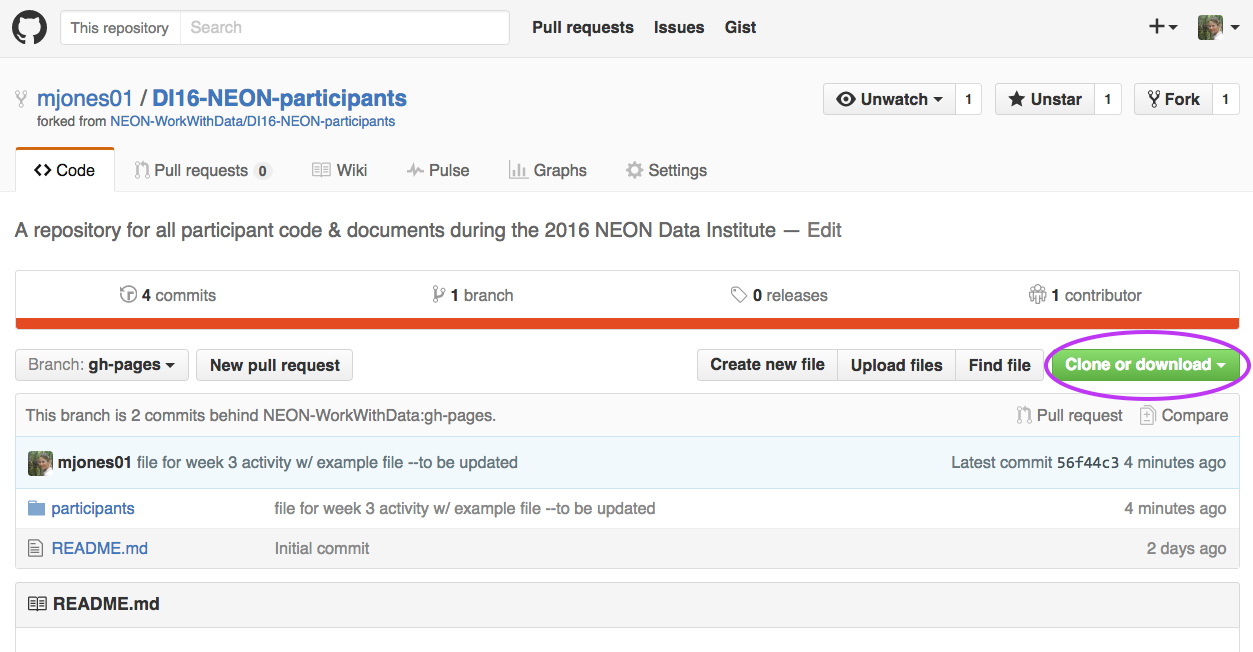
- Navigate to the repo that you want to clone (copy) to your computer --
this should be
YOUR-USER-NAME/DI-NEON-participants. - Click on the Clone or Download dropdown button and copy the URL of the repo.

Then on your local computer:
- Your computer should already be setup with Git and a bash shell interface. If not, please refer to the Institute setup materials before continuing.
- Open bash on your computer and navigate to the local GitHub directory that you created using the Set-up Materials.
To do this, at the command prompt, type:
$ cd ~/Documents/GitHub
Note: If you have stored your GitHub directory in a location that is different
- i.e. it is not
/Documents/GitHub, be sure to adjust the above code to represent the actual path to the GitHub directory on your computer.
Now use git clone to clone, or create a copy of, the entire repo in the
GitHub directory on your computer.
# clone the forked repo to our computer
$ git clone https://github.com/neon/DI-NEON-participants.git
The output shows you what is being cloned to your computer.
Cloning into 'DI-NEON-participants.git'...
remote: Counting objects: 3808, done.
remote: Total 3808 (delta 0), reused 0 (delta 0), pack-reused 3808
Receiving objects: 100% (3808/3808), 2.92 MiB | 2.17 MiB/s, done.
Resolving deltas: 100% (2185/2185), done.
Checking connectivity... done.
$
Note: The output numbers that you see on your computer, representing the total file size, etc, may differ from the example provided above.
View the New Repo
Next, let's make sure the repository is created on your computer in the location where you think it is.
At the command line, type ls to list the contents of the current
directory.
# view directory contents
$ ls
Next, navigate to your copy of the data institute repo using cd or change
directory:
# navigate to the NEON participants repository
$ cd DI-NEON-participants

# view repository contents
$ ls

404.md			_includes		code
ISSUE_TEMPLATE.md	_layouts		images
README.md		_posts			index.md
_config.yml		_site			institute-materials
_data			assets			org
Alternatively, we can view the local repo DI-NEON-participants in a finder (Mac)
or Windows Explorer (Windows) window. Simply open your Documents in a window and
navigate to the new local repo.
Using either method, we can see that the file structure of our cloned repo exactly mirrors the file structure of our forked GitHub repo.
Summary Workflow -- Create a Local Repo
In the github.com interface:
- Copy URL of the repo you want to work on locally
In shell:
-
git clone URLhere
Note: that you can copy the URL of your repository directly from GitHub.
Got questions? No problem. Leave your question in the comment box below. It's likely some of your colleagues have the same question, too! And also likely someone else knows the answer.